

Anti-Helix Piercing: Pain, Healing, Jewelry Types, and More
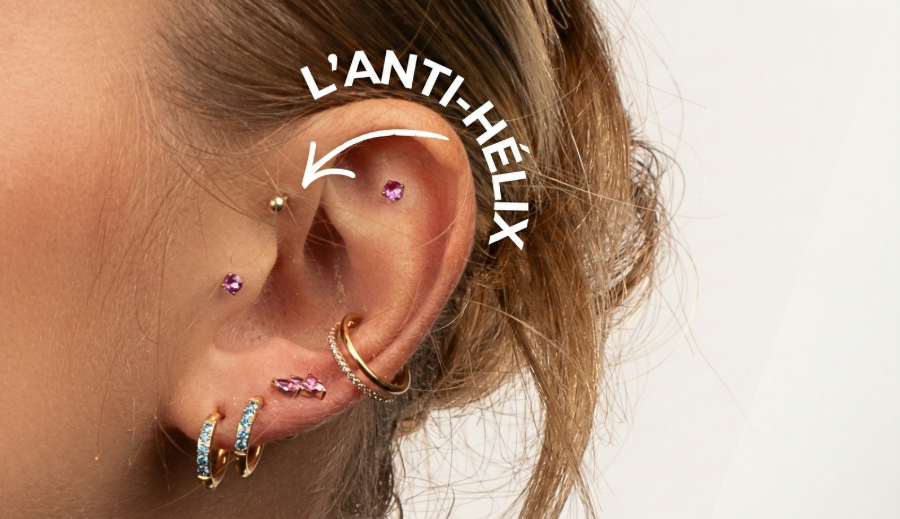
The anti-helix piercing, also called the "forward helix," gets its name because it sits opposite the helix, the part that forms a tube running around the outer edge of your ear. It's placed near the end of the helix, just above the tragus.
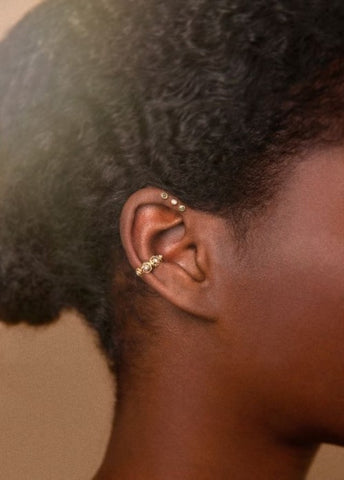
Depending on the style you're going for, just like with the helix, it's entirely possible to get multiple anti-helix piercings so you can add several pieces and really let your creativity shine: several zirconia stones in decreasing sizes, opals or natural stones instead of zirconia, or even multiple hoops! The possibilities are endless, and you're sure to add a unique touch to your look.
The anti-helix piercing, on top of being fairly uncommon, is also low-maintenance once it's fully healed.
With this guide, we want to help make things clearer around this lesser-known piercing. You'll learn everything about healing, pain, aftercare, and choosing the right jewelry for your new anti-helix piercing.
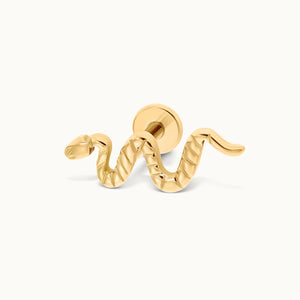
Table of Contents
Getting Ready for Your Piercing
As with any piercing, you'll need to be careful when choosing your piercer. It's essential that they use the right equipment (a sterile, single-use needle), and that the studio follows proper hygiene standards.
When you visit your piercer, they'll be able to tell you whether an anti-helix piercing is possible for you, since depending on the shape of your ear, there may not be enough room for one. Don't worry: it's rare not to have enough room.
Together with your piercer, you'll choose the placement for your new piercing. They'll mark the exact spot, and once you've confirmed it, they'll perform the piercing after cleaning your ear.
Anti-Helix Piercing Pain
Like any other ear cartilage piercing (conch, helix, daith, and more), this one is fairly painful. That said, this part of the cartilage is fairly thin, and the piercing itself only takes a few seconds, so you'll get through it easily. We'd rate this piercing a 5/10 on the pain scale, since it's located in ear cartilage.
Of course, keep in mind that this will also depend on your pain tolerance as well as your piercer's experience: everyone feels it a little differently.
Anti-Helix Piercing Healing
Since ear cartilage is an avascular area, healing takes longer than for other piercings, like the lobe, for example. It's also more prone to infection, so it's essential to closely follow the aftercare instructions from your piercer and the routine outlined in this guide.
Expect 6 to 9 months, or more, for your anti-helix piercing to fully heal. You'll then need a check-up visit with your piercer so they can give you the green light to stop aftercare. From that point on, you'll also be able to change your jewelry yourself without any risk.

Aftercare for Your New Piercing
Just like with a daith or tragus piercing, the anti-helix piercing sits right at the opening of the ear canal, so you'll need to watch out for bacteria to avoid infection.
Always handle your ear and your new piercing with clean hands!
Clean your piercing 2 to 3 times a day with a saline solution, using a compress or a cotton swab. Be gentle to avoid catching the jewelry, which could damage the healing tissue.
Watch out for hair and earphones. Since the anti-helix piercing sits close to the face, it's very exposed to bacteria, just like its neighbor the tragus. It may be worth tying your hair back, at least during the initial healing phase, to keep it from catching on your jewelry or bringing bacteria near it.
Don't sleep on the ear you just had pierced. That's why we always recommend avoiding getting both ears pierced at once, since sleeping on your back isn't an option for everyone. That said, you can absolutely get multiple piercings on the same ear if you'd like, such as a double or triple anti-helix.
Don't play with your jewelry. During healing, avoid playing with your jewelry (especially with unwashed hands), since this can damage healing tissue and your ear cartilage. This applies to a labret/straight bar, but even more so if you're wearing a hoop!
Avoid foreign objects that could introduce bacteria and lead to infection in your piercing: pools and the beach are strongly discouraged during healing. You should also make sure to sleep on a clean pillow every night; if you don't want to change your pillowcase daily, you can place a clean cloth over your pillow instead.
Which Jewelry to Choose for an Anti-Helix Piercing
For an anti-helix piercing, you have several options:
- Hoop: you could wear a fairly small clicker or seamless hoop, or even stack several if you have multiple anti-helix piercings. Whether it's a 14K or 18K gold hoop for a classic look and jewelry that'll last a lifetime, or a titanium hoop that you can leave in its natural color or have anodized (a surface treatment process that changes titanium's color) in the shade of your choice. You could also find a beautiful hoop set with zirconia stones, like our titanium Eternity hoop.
- Labret (straight bar) with a screw-on top: your initial jewelry will be a labret with a screw-on top, either a simple ball or another style of top. In our shop, we offer a range of options: opals, zirconia (prong-set or cabochon), natural stone, in either 14K or 18K gold or ASTM F-136 grade titanium. Labret bars come included with most of our jewelry, so all you need to do is choose the right size for your anatomy and piercing when ordering.
To switch to a hoop for your new anti-helix piercing, you'll need to wait at least 1 to 2 months after getting pierced, since a hoop could damage the healing tissue or your ear cartilage and slow down healing. At your check-up visit after 1 to 2 months, your piercer will let you know whether you're ready to switch to a hoop. You can then choose one from our online shop: we offer jewelry in 14K or 18K gold, as well as more affordable pieces in ASTM F-136 grade titanium. Free delivery is available from €160.
Choosing the Right Material:
We often tend to focus on how a piece of jewelry looks, but you shouldn't overlook its quality, especially for a piercing. Some materials are more likely to cause complications like infections or allergies. What's more, throughout the healing phase, it's essential to wear jewelry made from a biocompatible material:
- Gold: gold can be used as initial jewelry and throughout the entire healing phase. There's one condition, though: it needs to be 14 or 18 karat gold, since 9 karat gold isn't pure enough and contains nickel, while 24 karat gold is too soft for piercing jewelry.
- Titanium: titanium is the go-to material for new piercings. It's reasonably priced, lighter than surgical steel, recognized as biocompatible, and sturdy enough to last you a good while. Just make sure it's ASTM F-136 grade. Titanium jewelry can also be anodized, as we do in our shop. Anodization is a surface treatment process that changes titanium's color (gold, rose gold, blue, and more).
- Surgical Steel: steel is one of the most popular materials in the industry thanks to its low cost, but it contains nickel. The only biocompatible grade of surgical steel is ASTM F-138, though even that still contains nickel, so it's not recommended during healing. Surgical steel jewelry is cheaper than titanium, but less durable, heavier, and more likely to cause an allergy or infection. So you'll need to be careful about steel quality if you want to give it a try.

What Size to Choose for Your Anti-Helix Piercing Jewelry:
Wearing the right size jewelry matters both for a polished look and to avoid complications. Here's a table of standard sizes used by professional piercers for the anti-helix piercing:
|
Jewelry |
Thickness |
Length/Diameter |
|
Anti-Helix with a Bar (Labret) |
1.2mm |
5/6mm |
|
Anti-Helix with a Hoop |
1/1.2mm |
6mm |
Of course, these sizes are just a general guide. Feel free to discuss with your piercer at your check-up visit if you'd like to know the size that suits your anatomy. The sizes in this table are standard but may not match every anatomy.
To account for swelling after the piercing, your piercer will fit you with a longer labret bar at first, which they'll swap for a shorter one at a follow-up visit.
Price of the Piercing
In our studios in France, prices for an anti-helix piercing range between €40 and €60, the same range as other ear cartilage piercings, like the conch, tragus, or helix, for example.
Of course, price can vary depending on your region and the experience of the piercer you go to. The price usually includes basic initial jewelry (a labret bar with a basic screw-on top).
Changing Your Anti-Helix Piercing Jewelry
While the location of the anti-helix piercing makes changing it a bit trickier than for other piercings, like the conch or tragus, for example, it's still entirely possible to change it yourself. That said, we strongly recommend having your first jewelry change done by your trusted piercer. You can check with them on the right size for you, whether you plan to choose a labret bar or even a hoop yourself afterward, one that'll pair beautifully with your piercing.
Once healing is fully complete, feel free to change your jewelry on your own. Just be careful about leaving your piercing empty, since it could close up within just a few days.
Beyond being available to advise you 7 days a week, we offer a range of premium-quality piercing jewelry at accessible prices in the Obsidian Piercing online shop. All of our jewelry is guaranteed nickel-free, made entirely from 14/18K gold or ASTM F-136 titanium. The durability of our jewelry means you can wear it every day without worrying about it wearing down, whether in the shower, at the gym, and more. What's more, free delivery is available from €160, and you can get 10% off your first order by signing up for our newsletter (click the bell icon in the menu bar).
Check out our range of anti-helix piercing jewelry in our shop!
We hope this article has answered all your questions. Feel free to share your experience with the anti-helix piercing, or any concerns you might have about it, in the comments below.
We're always here to answer any other questions you may have.