

Navel Piercing: Pain, Healing, Jewelry Types, and More
The navel piercing has been one of the go-to choices in body piercing for a long time now. Its popularity probably comes from the fact that it's fairly low-pain compared to ear cartilage piercings, for example. It's also a piercing that's easy to hide at work.
The navel piercing sits on the upper part of the navel, which allows the jewelry to rest inside it. It'll be your best asset in summer for standing out at the beach, or for completing your look with a crop top, for example.
Because of where it sits, the navel piercing is often covered by clothing, so that's a factor to keep in mind during healing. That's why we've put together a complete guide to this iconic piercing.
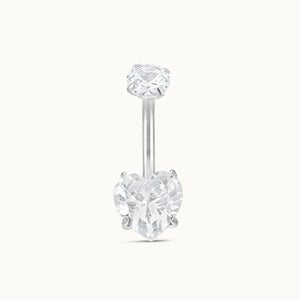
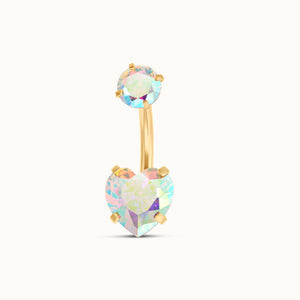
Table of Contents
Getting Ready for Your Navel Piercing
Keep in mind that some people won't be able to get a standard navel piercing because of their anatomy, which is why it's important to be guided by a qualified piercer who can advise you and let you know whether a basic navel piercing is possible for you, or suggest an alternative if it isn't.
When Should You Get a Navel Piercing?
A navel piercing can take a while to heal. It might be tempting to get pierced in spring right before summer, since a beautiful navel piece would add a glamorous touch to your beach look. However, it's better to get your navel piercing in the fall, to give it enough time to heal before the following summer. That way, your navel piercing will look its best once healed, and you'll avoid slowing down healing through contact with sand and various bacteria.
Make sure to be guided by a piercer you trust for your new navel piercing. It's important to be looked after by someone skilled who follows proper hygiene rules and uses the right equipment (a sterile, single-use needle) for the piercing, but who also knows how to put you at ease so everything goes smoothly.

Navel Piercing Pain
Since the navel piercing goes through soft tissue, it tends to be less painful than a cartilage piercing, for example. That doesn't mean it's completely painless: you'll still feel a slight pinch during the piercing itself, which passes very quickly and is nothing you can't handle.
In the days following the piercing, you'll likely feel some mild discomfort, along with slight swelling. This is completely normal, but if the pain feels like too much, don't hesitate to check with your trusted piercer, who can then advise you on whether to see a doctor. To help your navel piercing heal as well as possible, it's important to follow the cleaning instructions.
Navel Piercing Healing
The navel piercing can take a while to heal. Within a few weeks it will look healed on the surface, but it generally takes 6 to 9 months to fully heal on the inside. During this time, make sure to follow the aftercare instructions so your healing goes as smoothly as possible and this timeline doesn't stretch out further. In some cases, it can take longer to fully heal, so don't hesitate to book a check-up visit with your piercer before stopping your aftercare routine.

Aftercare Rules for Your New Piercing
The navel piercing follows an aftercare routine similar to other piercings, but given its position, there are a few other important factors to consider.
The first thing to keep in mind is to always wash your hands before touching your piercing, to avoid introducing bacteria.
Avoid the beach. Sure, that's where your navel piercing will shine the most, but if you want your healing to go smoothly, you'll need to avoid swimming pools, sand, and anywhere else that could introduce bacteria into your piercing. Beach sand could bring foreign particles into your piercing, which could lead to infection. You can still sunbathe by the pool, but wait until it's fully healed before jumping in the water!
Wear jewelry that's the right size. It's fairly common for the body to reject a new piercing, especially with a navel piercing. Rejection can happen for many reasons, including using low-quality metal jewelry, but it's often related to the size of your jewelry. Your curved barbell needs to be long enough to allow room for the slight swelling that follows the piercing, but short enough that it doesn't pull on your piercing. So you'll need to wait before switching to a bigger navel piece, like a dangle charm, for example. If you suspect your body is rejecting the piercing, don't wait to check with your piercer.
Use a saline solution daily with a sterile compress. Because of where it sits, a navel piercing can be hard to keep clean, which is why it's important to clean it once or twice a day using a sterile saline solution with a compress. Avoid alcohol, hexamidine-based antiseptics, and hydrogen peroxide, which can damage healing tissue, or iodine-based solutions, which can dry out your piercing.
Be careful with your clothing. Friction on your navel piercing shouldn't be overlooked: if it catches on your clothing, a sudden movement could "rip" the jewelry out. Even light friction should be watched, since it can lead to a bump that complicates healing and won't leave you with the look you were hoping for. So avoid clothing that sits too close to the body or that could catch on your jewelry, and it's also best to avoid high-waisted jeans, since they'll continually rub against your new piercing. Some people might suggest covering your piercing with a compress or a bandage, but that traps heat and moisture in a way that's ideal for bacteria and won't let it breathe.

Which Jewelry for a Navel Piercing
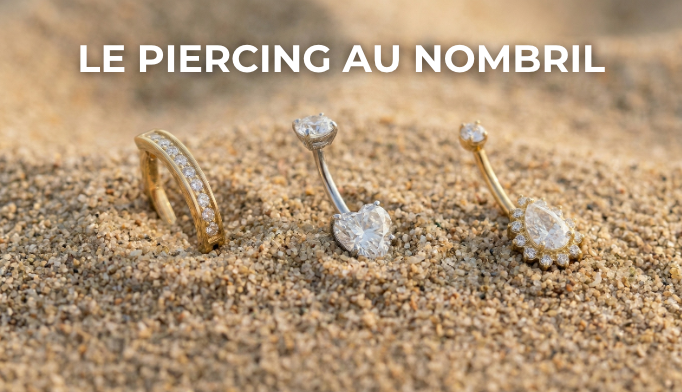
In most cases, you'll see a curved barbell piercing set with a natural stone, a fine stone like zirconia, or an opal. You'll also find dangle charms, but these won't be an option until your piercing is fully healed.
Which Material Should You Choose for Your Navel Piercing Jewelry?
As we so often point out, not all materials are equal, especially when it comes to piercing jewelry. It's important to choose good-quality, well-suited jewelry to support healing, so you can have an experience free of allergies or infection.
- Gold: if you want the best quality jewelry available, gold and platinum are as good as it gets. Just keep in mind we're talking about solid gold jewelry here, not gold-plated pieces (which are often made of steel, brass, or silver underneath). That said, make sure to choose jewelry that's at least 14 karat gold so it's recognized as biocompatible and safe to use during healing or as your initial jewelry: below 14 karats, jewelry will contain nickel, and above 18 karats, it'll be too soft for piercing jewelry
- Titanium: titanium is a lightweight, nickel-free metal that you can safely use as your initial piece for a new piercing. Just make sure it's ASTM F-136 grade (Ti6Al4V ELI). Titanium jewelry can be anodized to give it different colors (gold, rose gold, blue, and more); we actually offer the option to choose a color on the titanium jewelry on our site, thanks to the anodization process.
- "Surgical" Steel: a very popular choice since it's cheaper, though it contains nickel and so isn't recommended, and often isn't even offered as initial jewelry. There is, however, one steel grade that is biocompatible: ASTM F-138. So if you do want to go for a steel piece, be careful to choose the right one to avoid unpleasant surprises. We only recommend 316L surgical steel for fully healed lobes.
As you can tell, you'll need to be careful about your choice of jewelry so your experience with your new piercing doesn't turn into a nightmare. We also try to raise awareness about the quality differences between piercing jewelry, since reliable information on the subject is unfortunately scarce, and often biased. Some sites or sellers don't disclose the metal their jewelry is made from or its grade, so be wary when that's the case, and don't hesitate to ask questions!

Price of a Navel Piercing
In our studios in France, prices for a navel piercing generally range between €40 and €60. As with any piercing, choose based on quality of service, not price. Never choose a piercer who uses a piercing gun. It's also important for a navel piercing that your piercer chooses the right jewelry size, so your healing goes as smoothly as possible and your body doesn't reject it.
Variations on the Navel Piercing
You might think a classic like the navel piercing only comes in one style, but that's where you'd be wrong.
It's possible to get the piercing on the lower part of the navel, flipping the orientation for anyone who prefers their jewelry to sit lower than a standard navel piercing.
It's also possible to get a double navel piercing. Several combinations are possible, but the most common is pairing one piercing on the upper part with another on the lower part of the navel.
How to Change Your Navel Piercing
For the first jewelry change, we recommend having it done by your trusted piercer. If you'd like to do it yourself, you should wait until the piercing is fully healed (which can take up to a year).
Before removing your jewelry, always make sure to wash your hands properly first. You'll then need to remove the ball at the top of your jewelry so you can slide the piece out to remove it. You can insert the new jewelry the same way; you can use a special lubricant to help it slide in more easily, in which case you'll need to clean the threading before attaching the ball, to remove any leftover lubricant.
If you're ever unsure, don't hesitate to go back to your piercer, who can guide you through changing your jewelry.
We hope this article has answered your questions. If you'd like more information, feel free to contact us through our site's contact page.
Feel free to share your experience with the navel piercing in the comments, or any concerns you might have about it!